What is Penicillin?
Penicillin is a natural substance secreted by various Penicillium mold species. It works by both inhibiting bacterial growth, and directly killing some bacteria. It can be used for treating throat, respiratory, and skin infections. However, it is ineffective against certain infections such as teeth infections and UTIs.
It was accidentally discovered by the Scottish physician and microbiologist, Sir Alexander Fleming in 1928 after leaving a culture plate with Staphylococcus bacteria uncovered.
The plate had molds growing on it, and there was a circular zone around it that didn’t have any bacterial growth. He proceeded to isolate and grow the mold in pure culture and found the substance to be extremely effective even at low concentrations. It was the birth of penicillin, which would later lead to the development and production of other penicillin derived antibiotics.
Making penicillin is not hard, but can take some time. Below is a summary of the steps that preppers need to do to produce penicillin.
- Penicillium mold must first be correctly isolated from either a cantaloupe, a fruit rind, or non-commercial bread.
- After isolating the mold, it must be cultured to increase the rate of its growth.
- The next step is to ferment this culture to further increase growth and promote its production of Penicillin.
- The last step is to isolate and purify the Penicillin produced by the mold.
Preparation
Before setting out to manufacture your Penicillin, preppers must understand what sterilization is and how it can be achieved. Sterilization is the process that results in the removal, killing, or deactivation of all forms of life.
A sterile item or product which is touched by a non-sterile object is considered non-sterile. As such, in making Penicillin, a sterile technique should always be observed to prevent contamination of the end product, which can result in the growth of harmful microbes.
Sterilization of materials and necessary utensils to be used in this process will differ depending on the type of material an item is made up of.
- Glass: Place inside an oven preheated to 315 °F for 1 hour.
- Metal objects: Place inside an oven preheated to 340 °F for 1 hour.
- Cotton cloth and cheesecloth: Boil water, submerge cloth in the boiling water, and keep boiling for 5 minutes.
Complete List of Materials Needed

Isolation of the Penicillium mold
- Cantaloupe – best starting material
- Citrus rind and bread from a local bakery – alternatives to cantaloupe
- Large deep glass container that can fit a halved cantaloupe, sterilized
- Saran wrap
- Splash of distilled water at room temperature
Culturing the isolated mold
- 200grams washed, unpeeled potato, thinly sliced
- 1 Liter mason jar with metal lid
- A large pot
- Newly opened cheesecloth or sterilized used cheesecloth
- Sterilized strainer
- 1pc 1 Liter glass beaker, sterilized
- 4 to 6 pcs 250ml wide and flat mason jar, sterilized with metal lid
- Sterilized metal spoon/stirrer
- 20g sugar
- 20g agar or plain unflavored gelatin
- 2 liters distilled water
Transferring isolated mold into the broth
- Small hard metal wire with the end bent into an oval loop
- A source of flame: Bunsen burner or a candle
Fermenting
- 1 Liter Erlenmeyer flask or a mason jar, sterilized
- A sterilized glass stirrer or a metal spoon
- 100ml graduated cylinder
- 1 tsp sugar
- 1 tsp yeast extract (Marmite)
- 1 tsp citric acid
- 1 tsp non-fat milk powder
- 1 tsp sea salt (not iodized, do not use Himalayan pink salt)
- Sterilized aluminum foil to cover the flask
Extracting
- Sterilized metal strainer
- Sterilized or newly opened cheesecloth
- Sterilized 1L glass beaker
- Sterile spoon or stirrer
- pH tester: litmus strips or digital
- Hydrochloric acid and a dropper
- 2L separatory funnel
- 500ml Ethyl Acetate
- 125ml Potassium Acetate
Steps in Manufacturing Penicillin
Step 1: Isolation of the Penicillium mold
Gather all the materials listed above for this step. Make sure the glass container is sterilized.
- Wash your hands with soap and water. Wipe the cantaloupe lightly with a clean cloth, removing most of the dirt and dust if any.
- Slice it into half and lay it inside the container flat side down. Pour a tablespoon worth of distilled water inside.
- If using bread or citrus rind instead, place it inside the container.
- Cover it with saran wrap leaving 1 inch of the opening uncovered. This is to prevent the bread or fruit from completely drying out.
- Set the container on a corner away from direct sunlight, at room temperature (20-25°C).
- Wait for molds to grow. It can take up to a few weeks for this to happen.
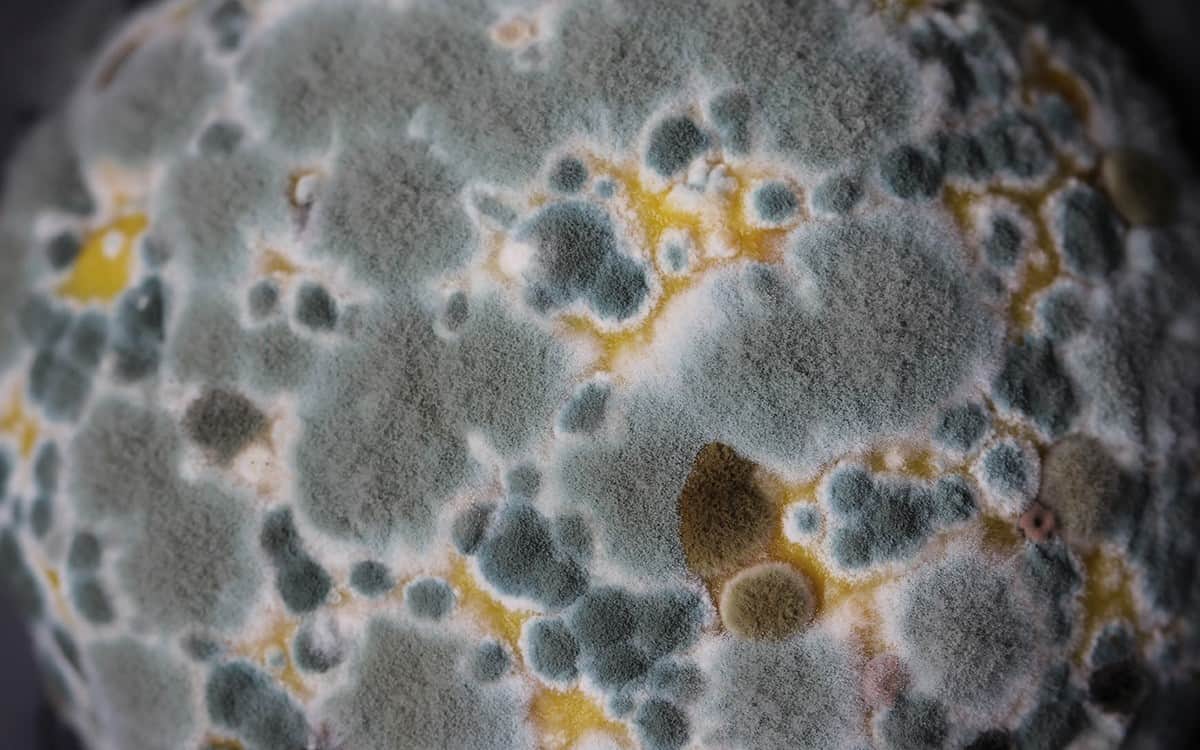
- What you’re looking for is a gray mold that eventually turns bluish-green.
Step 2: Preparing the growth media
Once you’ve successfully isolated the mold, we have to grow it on a broth made from potatoes and sugar.
- Thinly slice 200g of washed, unpeeled potato and transfer it into a 1L mason jar.
- Fill the jar with distilled water and screw the lid tightly.
- Boil water in a large pot. Place the entire jar in the pot of boiling water making sure it is submerged. Boil for 30 minutes and then set aside to cool down a little.
- Once the jar has cooled down, remove the lid and pour the liquid into the sterilized glass beaker by running it through a sterile strainer and cheesecloth.
- While the liquid is still warm, add in the sugar, agar, or gelatin and mix thoroughly using a sterilized metal spoon or stirrer. The gelatin or agar may not completely dissolve, but this is okay. Top it off with distilled water until it becomes 1 Liter in volume.
- Prepare your sterilized flat mason jars and their sterilized lid. Make sure these have cooled down.
- Pour the potato broth on each one of the jars filling them up to three-quarters full, making sure to observe sterility in the process by pouring without the containers touching.
- Immediately cover the jars with their sterile lid to prevent contamination.
Step 3: Transferring the Penicillium mold into the broth
After the broth has cooled down some more, we can now transfer the isolated molds into the growth media.
- Prepare the needed materials, the covered growth media, and the moldy fruit or bread. Make sure everything is within reach.
- Prepare a candle or a Bunsen burner.
- Sterilize the looped end of the wire by heating it over the flame until it becomes red hot.
- Open one of the growth media and dip the wire to cool it down. If you use it while it’s still hot, it will immediately kill the Penicillium mold.
- Once the wire has cooled down, use it to touch the bluish-green part of the moldy food.
- Now run the looped end just beneath the surface of the broth, making two lines. Touch the moldy food again, and make another two lines in the same media. Immediately close the jar after creating the lines.
- Repeat this on all of the growth media, making sure to sterilize the wire every time you finish one jar.
- Keep the jars covered and set them aside at room temperature, keeping them out of direct sunlight.
- Wait for around a week until you see growth. The mold will have a yellow or light-yellow substance surrounding the borders. This is penicillin.
- If there’s no yellowish substance, wait for a few more days then check again. If there’s none, discard that jar. The mold that grew might not be Penicillium. Unless you have a microscope to check and know how to identify the mold, then it is safer to just throw away the jar and start again.
- Only proceed to the next step if you’re sure that you’ve grown Penicillium molds.
Step 4: Fermenting
Once you’re sure that it is Penicillium that grew in the jars, we have to ferment it to facilitate the growth and reproduction of the mold. This step will increase the yield of penicillin.
- Prepare the needed materials making sure that all glass and metal utensils are sterilized.
- Take the 100ml sterilized graduated cylinder and scoop in using a clean teaspoon, 1 tsp sugar, 1 tsp yeast extract, 1 tsp citric acid, 1 tsp non-fat milk powder, and 1 tsp non-iodized sea salt. Top with distilled water until it reaches the 100ml marker. Stir a little until everything is incorporated.
- Transfer this mixture into the sterilized 1L Erlenmeyer flask or mason jar.
- Take the growth media with Penicillium and transfer all of its contents into the flask or jar. Make sure to practice the sterile technique by using only sterilized utensils and pouring without the two containers touching.
- Cover the container with a sterilized aluminum foil to keep out contaminants and leave it for 7 to 14 days. Do not exceed 14 days, as the Penicillium will starve and die.
Step 5: Extracting and Purifying
After 7 to 14 days, there should be a thick solid mass floating above the liquid. This is the Penicillium mold colony. The penicillin is dissolved into the liquid, but it is unstable and degrades rapidly. To make it shelf-stable, we have to extract and purify it into powder form.
- Chill the ethyl acetate bottle in the freezer.
- Prepare a sterile 1L glass beaker, a sterilized strainer, and a sterilized or new cheesecloth.
- Pour the liquid from the fermented flask through the strainer and the cheesecloth, into the sterile beaker.
- Use a pH tester or a litmus paper to check the pH of the strained liquid. The pH should be somewhere around 5. We want the pH of the liquid to be around 2 to 2.2. To achieve this, use a dropper and aspirate a few drops of hydrochloric acid. Add a drop into the liquid, stir with a sterile stirrer/spoon, and then check for the pH. Continue doing this until you reach a pH of 2 or 2.2. Be careful in doing this because it can potentially degrade the penicillin if the pH becomes too low.
- After the ethyl acetate has chilled, take it out and prepare the separatory funnel.
- Make sure the bottom tap of the funnel is closed. Pour the chilled ethyl acetate (500ml) and the strained liquid penicillin into the funnel. Close the top lid of the funnel and shake vigorously for 30-35 seconds.
- Set the funnel on its stand. Wait for a few minutes until the mixture separates. The bottom fluid is the ethyl acetate, and where the penicillin is dissolved.
- Drain the bottom fluid into the other sterile glass beaker.
- Add 1ml of Potassium Acetate per 100ml of drained ethyl acetate. Gently mix the solution using a clean stirrer.
- Set aside uncovered in a well-ventilated area. The ethyl will evaporate leaving only the penicillin.
- Store your penicillin in an amber-colored airtight glass bottle.
In general, 100ml of fermented liquid will yield around 100mg of penicillin. The steps above are not enough to yield a substantial amount of penicillin. A dose of penicillin for most infections is at 250mg every 8 hours for 10 days. That is around 750mg per day, and 7,500mg for the whole duration.
It is extremely important to not underdose penicillin. According to Sir Arthur Fleming, penicillin is not highly toxic, and a slight overdose will not result in complications. However, underdosing enables the offending bacteria that is being treated to survive, building resistance to penicillin. This is why there are new strains of bacteria called superbugs that are resistant to penicillin.
When SHTF and there are no more antibiotics available, it becomes a necessity to produce your own supply of antibiotics. Prepping the supplies to achieve this is not hard as long as the essential chemicals are stored properly. Preppers should learn this valuable knowledge to further increase their survival rate in a post-apocalyptic world.